
There is no greater pest among traffic sources than Google Ads. You can’t send conversion data to it with a simple postback request, but you want to optimize. We will act according to a tricky algorithm: we will ask Google to independently download our conversions directly from the tracker via a special link, and we ourselves will continue to send traffic as if nothing had happened.
General algorithm of work:
- In the “Google conversions” section of the tracker or platform, add a new document. In it, specify the parameters by which we filter conversions, for example, by flow or campaign.
- Select the domain to which our conversion download link will be attached. You can use the same domain to which you sent traffic to, or its subdomain.
- Get a link to a document that will give a list of conversions since the last request. There will be no duplicates – only new leads each time.
- Configure the list of conversions in Google Ads, add our
leadevent there or several events if you use goals. - Add an upload schedule where our link goes. The import happens once every 24 hours, but no one forbids adding several imports at different times of the day.
- We create documents for each Google account we work with, and enjoy the result – our conversions are imported.
In the AlterCPA Red tracker, the conversion settings are located in the “Tools” menu, in the AlterCPA One cloak, you can find them in the “Tracker” menu. On the AlterCPA Pro / Cloud platform, first activate the gclid hack and specify where to add the menu item – in “Tools” or in “Flows”.
Creating a document with conversions
You need to add your own separate document to each account from which you are sending traffic from. You need to specify any convenient name and fill in the important parameters:
- Tag. This is the field where you send your click ID from Google, usually
gclid. By default, the Ad ID field is used, where the Google click is loaded automatically. It is recommended to explicitly specifygclidin the link to which you are sending traffic, or in thegclidparameter, or in any other tag convenient for you. - Domain. At least one parked domain is required for import. It is not recommended to use the system one. It is optimal to choose the same domain to which you are sending traffic to. It is unknown whether a separate domain is needed for each account.
- Filters. Select the criteria by which to filter leads for this import. It is optimal to create separate document for each flow and separate flow for each account. If this is not possible, filter by domain or campaign name. Specifying filters in the document is strictly mandatory, otherwise the import task will pull out all the leads that you sent.
After creating the document, a link will appear in the URL field in the table that needs to be added to Google Ads. By this link, for each request, the system will issue a list of leads that have appeared since the last request. The date and time of the request will be in the table in the “Downloaded” field.
Manual Google account setup
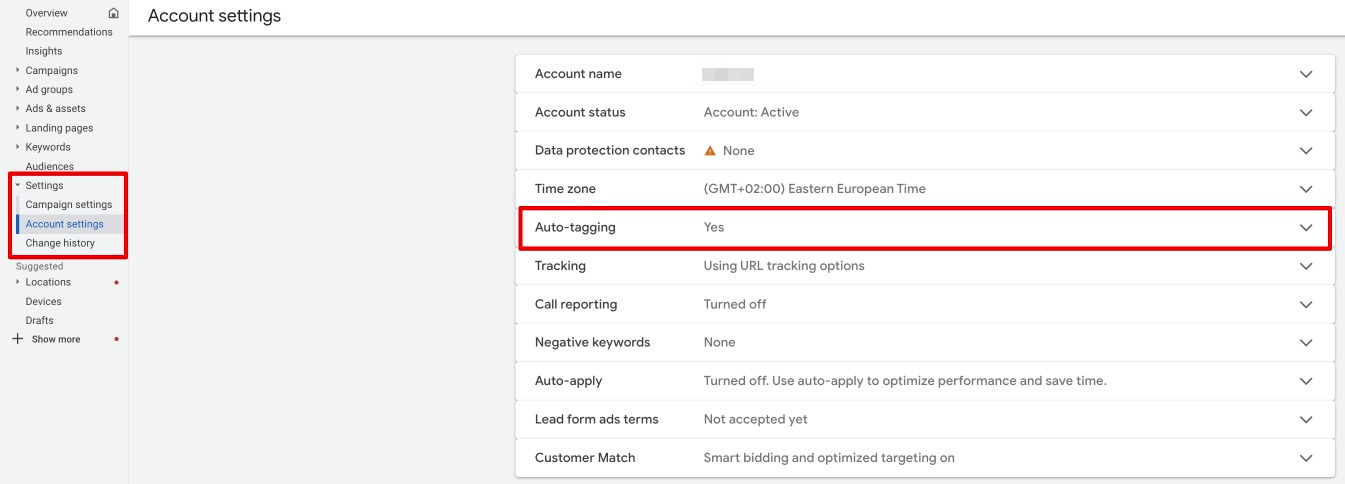
The instructions are borrowed from the author of the original manual script. The first step is to enable auto-tagging in Google Ads, that is, send the click ID. In the Settings -> Account settings section, enable the Auto-tagging item. On the AlterCPA side, this ID will be received automatically. If desired, you can explicitly add it to the link, for example: utm_term={gclid}.
The next step is to set up conversions. By default, AlterCPA products use one conversion goal: lead. That’s right, in lowercase, no capital letters – this is important.
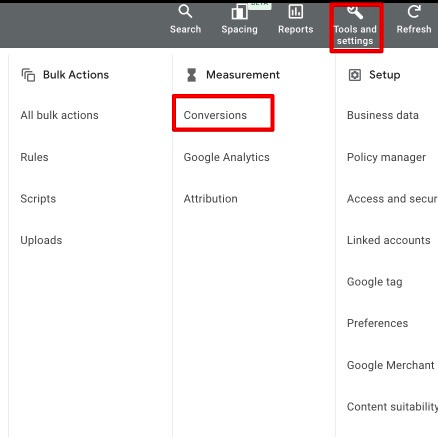
Go to Tools and settings, find Conversions in Measurement.
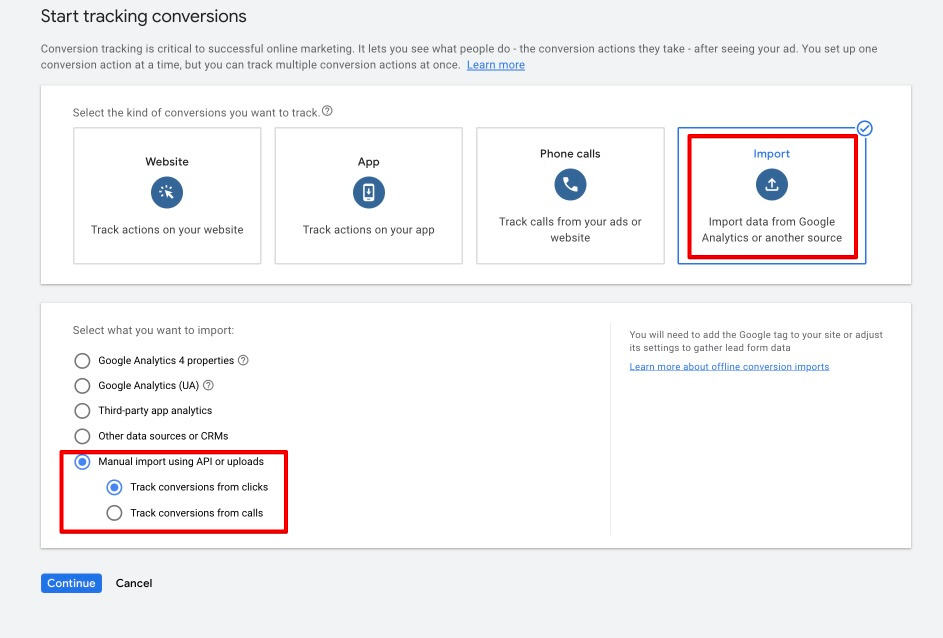
We select the Import option, we are interested in manual import by clicks: Manual import using API or uploads -> Track conversions from clicks.
Next, you should select a goal category. For example, select the Other category. Campaigns are optimized for goal categories that are selected as Default and for those goals in these categories that are selected as Primary. If you leave the “Add Other to account default goals” checkbox checked, this goal category will be used by default for campaigns.
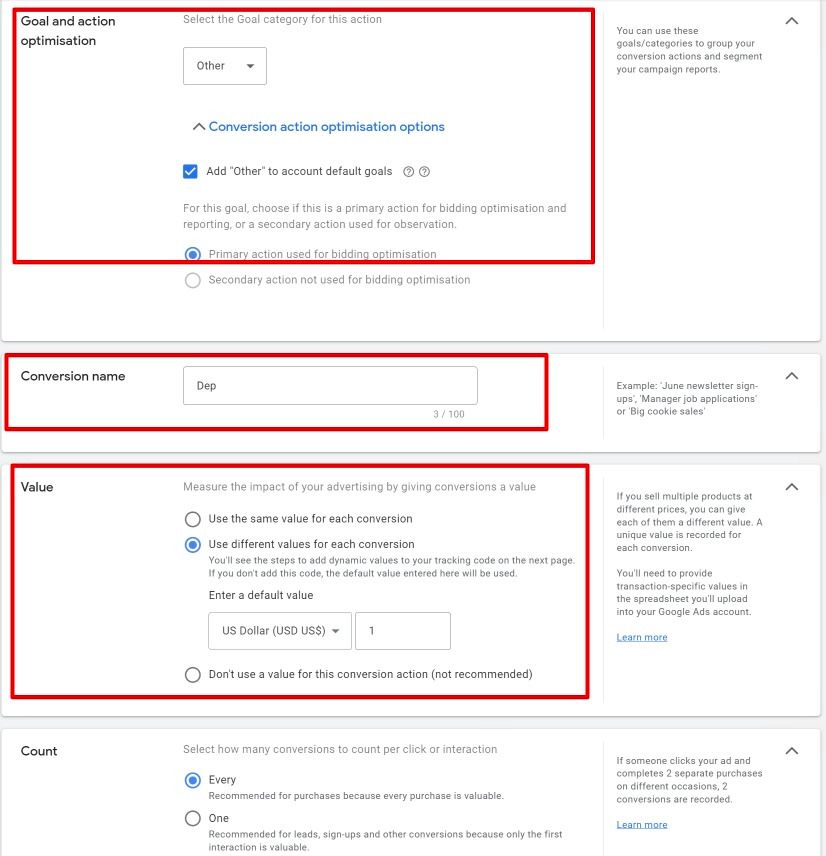
If you use several goals, for example, you added registrations and deposits separately, some of them can be specified as additional goals. For such goals, specify Secondary action not used for bidding optimization and configure it like this.
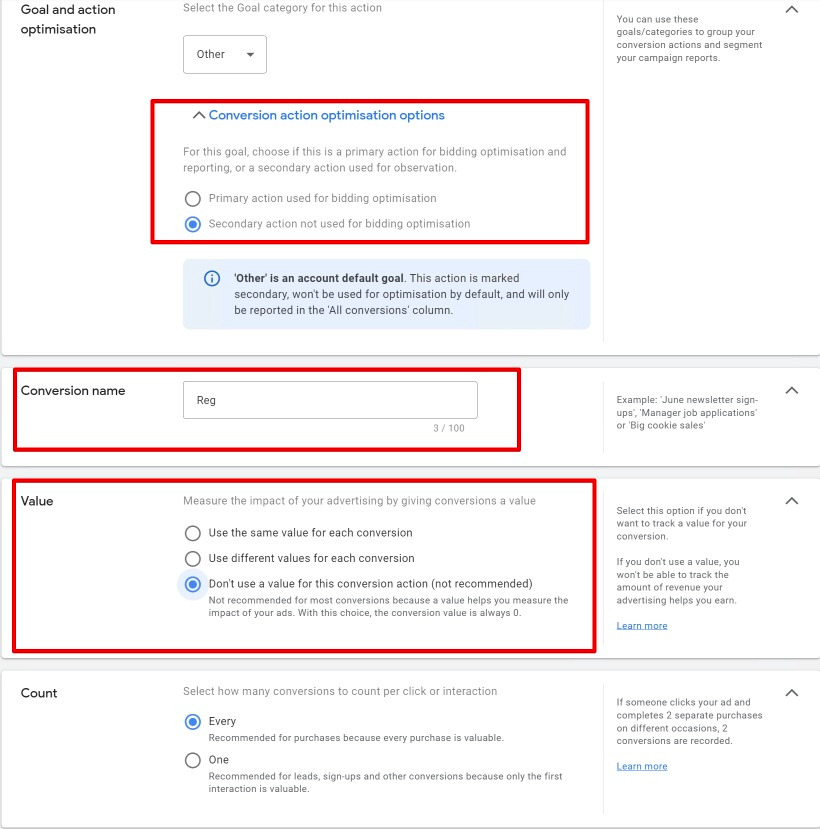
Leave the rest of the goal settings by default. In the classic case, we will have one main goal called lead (in small letters, important).
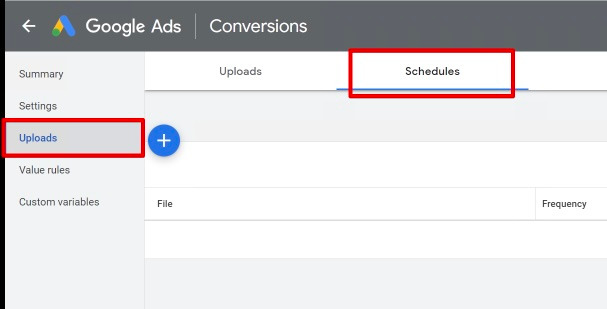
The last step is to create a conversion upload schedule. In the Conversions section, select Uploads, Schedules, click the plus sign.
In the form that opens, configure the import:
- Select HTTPS and specify the link from the table in the Source URL field.
- In the Frequency field, set Every 24 hours, more often is not possible.
- In the Time field, specify the upload time.
- Click Save & Preview and then OK.
- Repeat several times with different times.
An example of the settings looks like this:
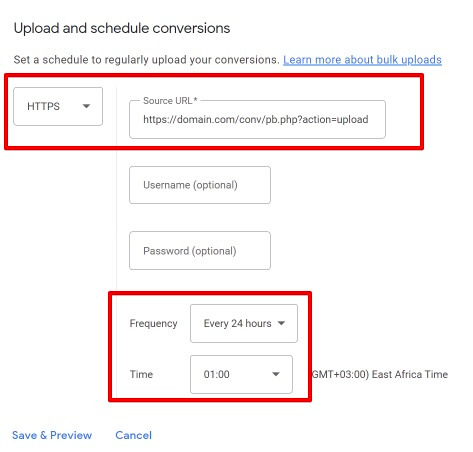
It is optimal to start four uploads every six hours. This drain is enough for successful optimization.
Automatic account setup via GGL
The GGL.farm multi-tool will handle all account settings on its own, you only need to provide it with a link and a list of goals you are working with.
- In the “Accounts” section, find the one you plan to set up and go to its page.
- Click “Add task” and select “Import conversions”
- In the URL field, enter the link shown in the table with uploads.
- In the “Main goals” field, leave lead or specify a list of goals, as with manual setup. Goals are specified one per line. If necessary, specify additional goals.
- Click “Run task” and the rest will be done automatically.
The import will be set to run four times a day. All manual settings will be performed automatically.
Brief summary
The best method for sending conversions to Google Ads is to upload a file on a schedule. Create an upload linked to a flow or domain and add it to your account. Don’t forget to set goals, names – in lowercase. To speed up the process, set up uploads every hour. Enjoy the result.