Is your site under DDoS attack? Skip to the next paragraph right away! This article will help you quickly get your site up and running if it’s under DDoS attack, but you’ve wisely covered it up with CloudFlare. If this has not already been done, your zero step should be transferring the domain to CloudFlare.
TL;DR: Our actions
- Enable “I’m under attack!” on the main page of the domain.
- In the DNS section, enable proxy for all records.
- In the SSL section, enable Flexible mode and Always use HTTPS.
- In the Security – Bots section, enable Bot fight mode.
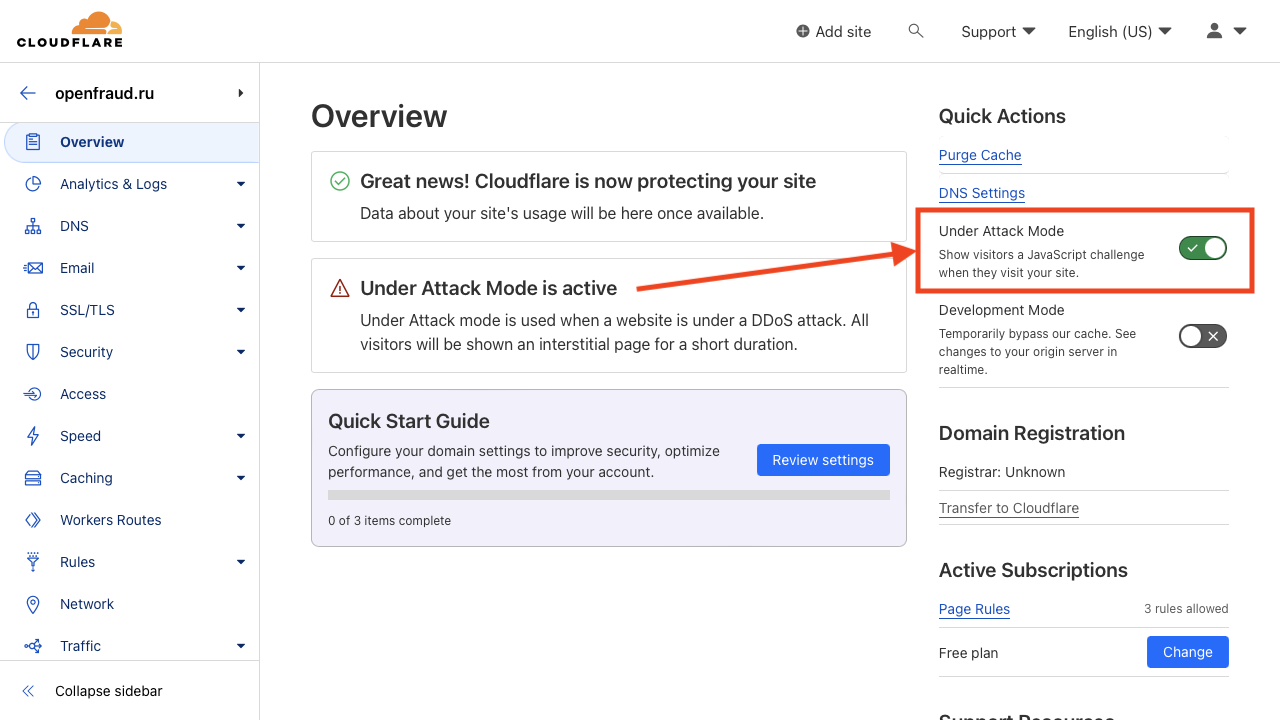
Step 1. “I’m under attack” mode
The very first step is to turn on attack defense mode. To do this, simply open your domain in CloudFlare – the “Under Attack Mode” button is right on the main domain management page. At the same time, the volume of garbage traffic will instantly decrease and you will immediately feel better.
Step 2. Check DNS records
Navigate to the DNS section and it’s Settings page. You need to make sure of the following:
- All A, AAAA, and CNAME records work through a proxy. This is a nice orange cloud with an arrow behind it. If the cloud is gray – press Edit, press Proxy status to Proxied value and press Save.
- If you have entries with a red exclamation point, for example, entries like MX with your domain, we temporarily delete them. They give away our real address, which is not safe under attack.
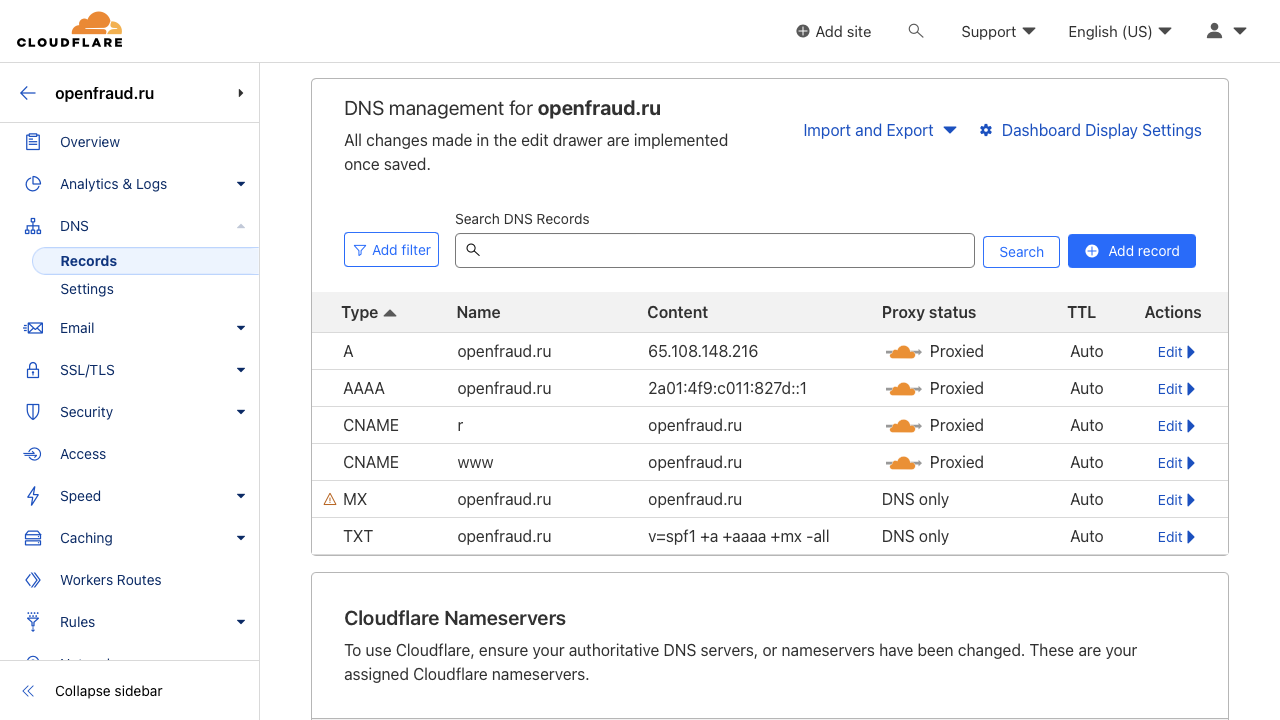
MX records can be restored later, but in general it is recommended never use a mail server at the same address as your sites. Get a separate virtual machine.
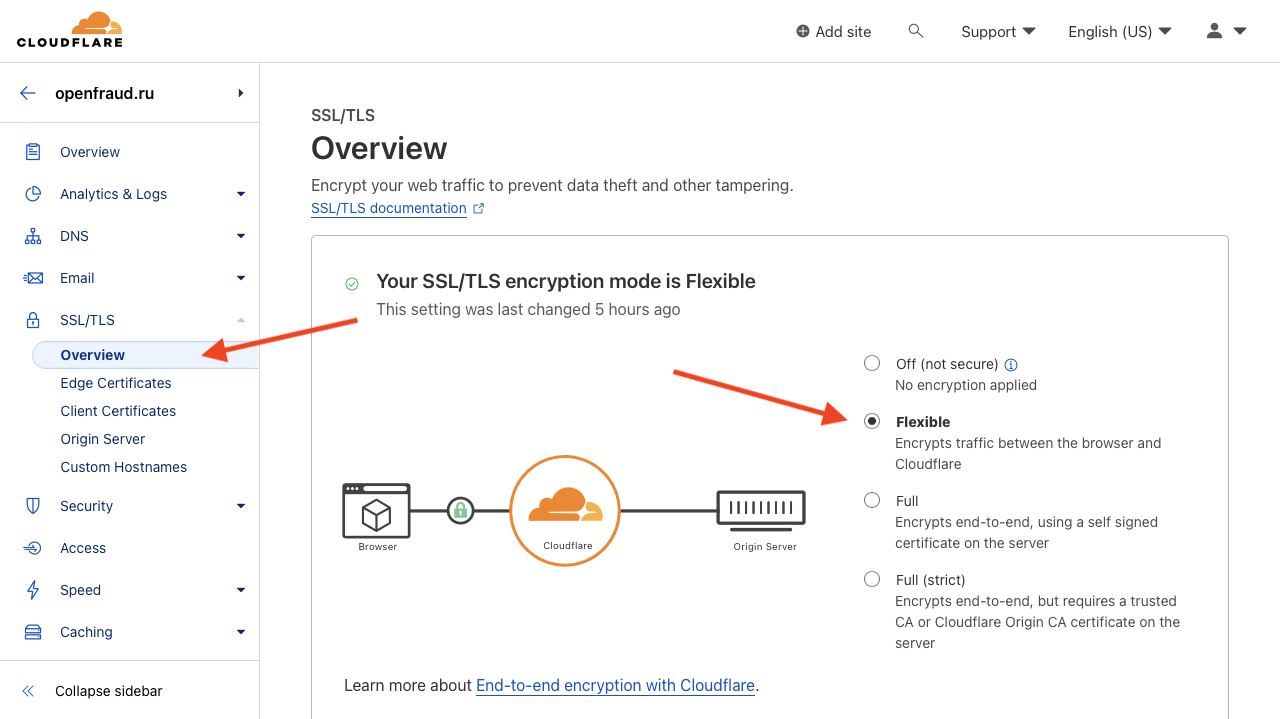
Step 3. SSL mode
Go to the SSL section and it’s Overview page. Select the Flexible operation mode. This will route all requests to your server over the fast HTTP protocol and relieve the server of the extra burden of preparing a secure connection. There is still no sense from it between servers.
Go to the Edge Certificates page here, in the SSL section. Enable the Always use HTTPS option. This will make it impossible for attackers to bombard you with light HTTP requests and redirect them to a heavy secure connection before they get to your site.
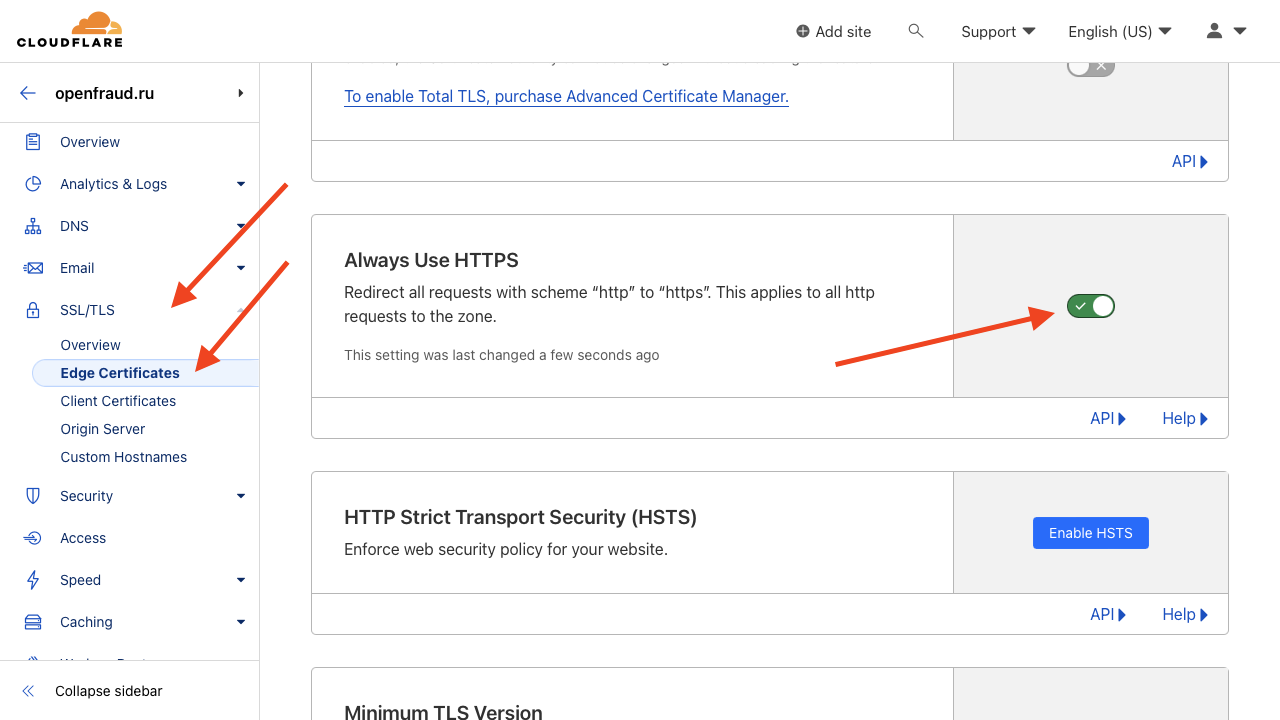
This way we will deprive the attackers of the advantage of light attacks, because all the work of establishing an SSL connection will fall on CloudFlare and most likely will end there. You can also enable Automatic HTTPS rewrites on this page just for convenience.
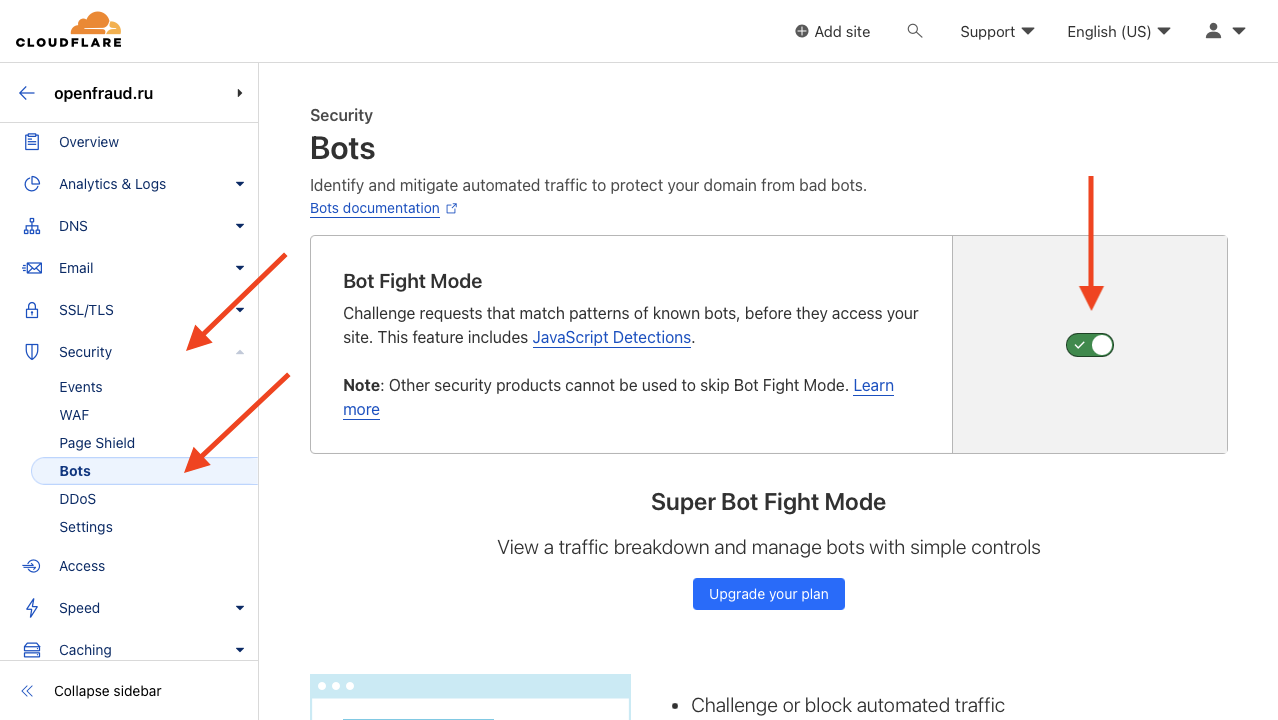
Step 4. Bot fight mode
Go to the Security section and it’s Bots page. Turn on Bot Fight Mode on it, this will help separate some of the attackers. Sadly, this will also kill search engine bots. But it’s better to keep them out altogether than to show them a slow connection.
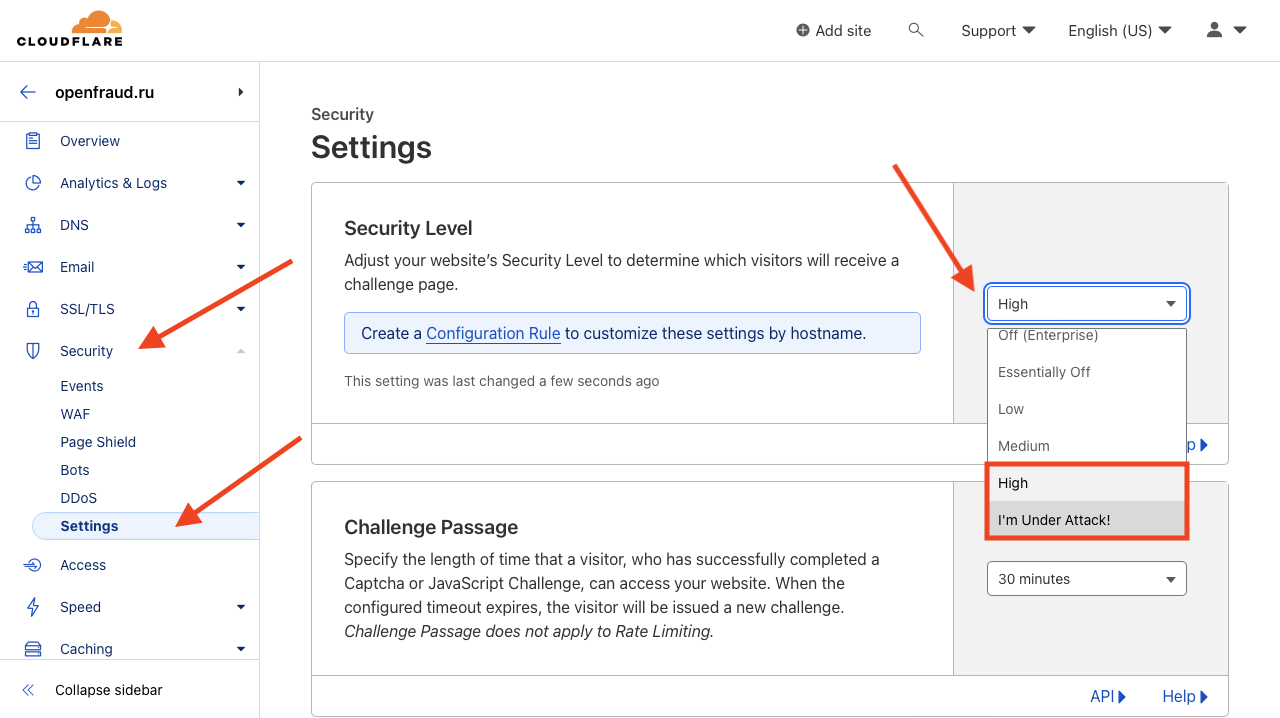
Step 5. Security level
When the peak of the attack subsides, you can improve the user experience and change the level of site protection. To do this, go to the Security section and it’s Settings page. Replace I’m Under Attack! with High, but don’t drop to Medium or Low until the end of the attack.
Next steps
At the current stage, you have reduced the attack power and most likely gave your site the opportunity to somehow work and show up. These tips may help you a little further:
- In the Cache section on it’s Configuration page, enable Always Online™ to display pages from the cache when the server is down.
- In the same place, check the caching mode in Standard and the caching time is not less than an hour, but preferably a day.
- In the Speed section and it’s Optimization page, enable automatic minification of all resource types.
That’s all, you can exhale and start looking for an attacker, improving your site and distributing its resources across different servers.