
Xoxo, everyone — it’s Reznik, and today we’re going to clean up teaser traffic.
Arbitrage guys have gotten it into their heads that teaser ads are dead and life these days revolves entirely around Facebook. So traffic costs have dropped in teaser networks, and so has the number of idiots working them. Perfect time to pour! And to pour well, you need to build a blacklist of placements where your ads just get clicked into nothing. AlterCPA One is here to help.
Here’s the task we’ll set for ourselves: analyze the traffic coming from a teaser network and separate the bot visits from the quality visits of actual useful humans. We’ll keep it dead simple – bots and people will each get tagged right inside a UTM tag. As our tag of choice, we’ll grab utm_medium, since it’s completely useless otherwise. Once the traffic’s been poured, we’ll pull an export of every source that came in tagged “Bot,” and build our blacklist from that.
Here’s what we’ll need to get this working:
- An account on AlterCPA One. Ideally paid and activated. Otherwise, you’ll have to pay for it first.
Grab a whole year up front! - A target link for pouring traffic. You can take a single flow and give it different UTM tags depending on traffic quality, or create two separate flows – one for people, one for bots. For a clean experiment, I wouldn’t recommend using links to different bundles.
- A parked domain. Any traffic you pour is best run through your own domains rather than the system’s click.altercpa.one, if nothing else because the system domain can already be sitting on every blacklist under the sun.
Step 1. Parking the Domain
We’ll need the parked domain to build our redirect links. You can use a single domain for everything, or park a separate domain or subdomain for each filtering link.
First things first: the domain needs to allow editing its DNS records. For that, it has to be pointed at either the registrar’s nameservers or CloudFlare’s. I prefer CloudFlare with the proxy switched off, since its NS servers are the fastest around.
Go into your domain’s zone management. Delete every existing A, AAAA, and CNAME record tied to the domain you need. If you’re planning to use the domain itself, that means the WWW and @ (or bare domain name) records. If it’s a subdomain, then the records for that subdomain, both with and without WWW.
Add two records:
- An A record named @ (or the subdomain name) with the value 95.216.29.72
- An AAAA record named @ (or the subdomain name) with the value 2a01:4f9:2a:1d9b:0:0:0:13
Don’t add a record for the WWW subdomain – the system doesn’t use it. If you’re on CloudFlare, double-check that proxying is switched off.
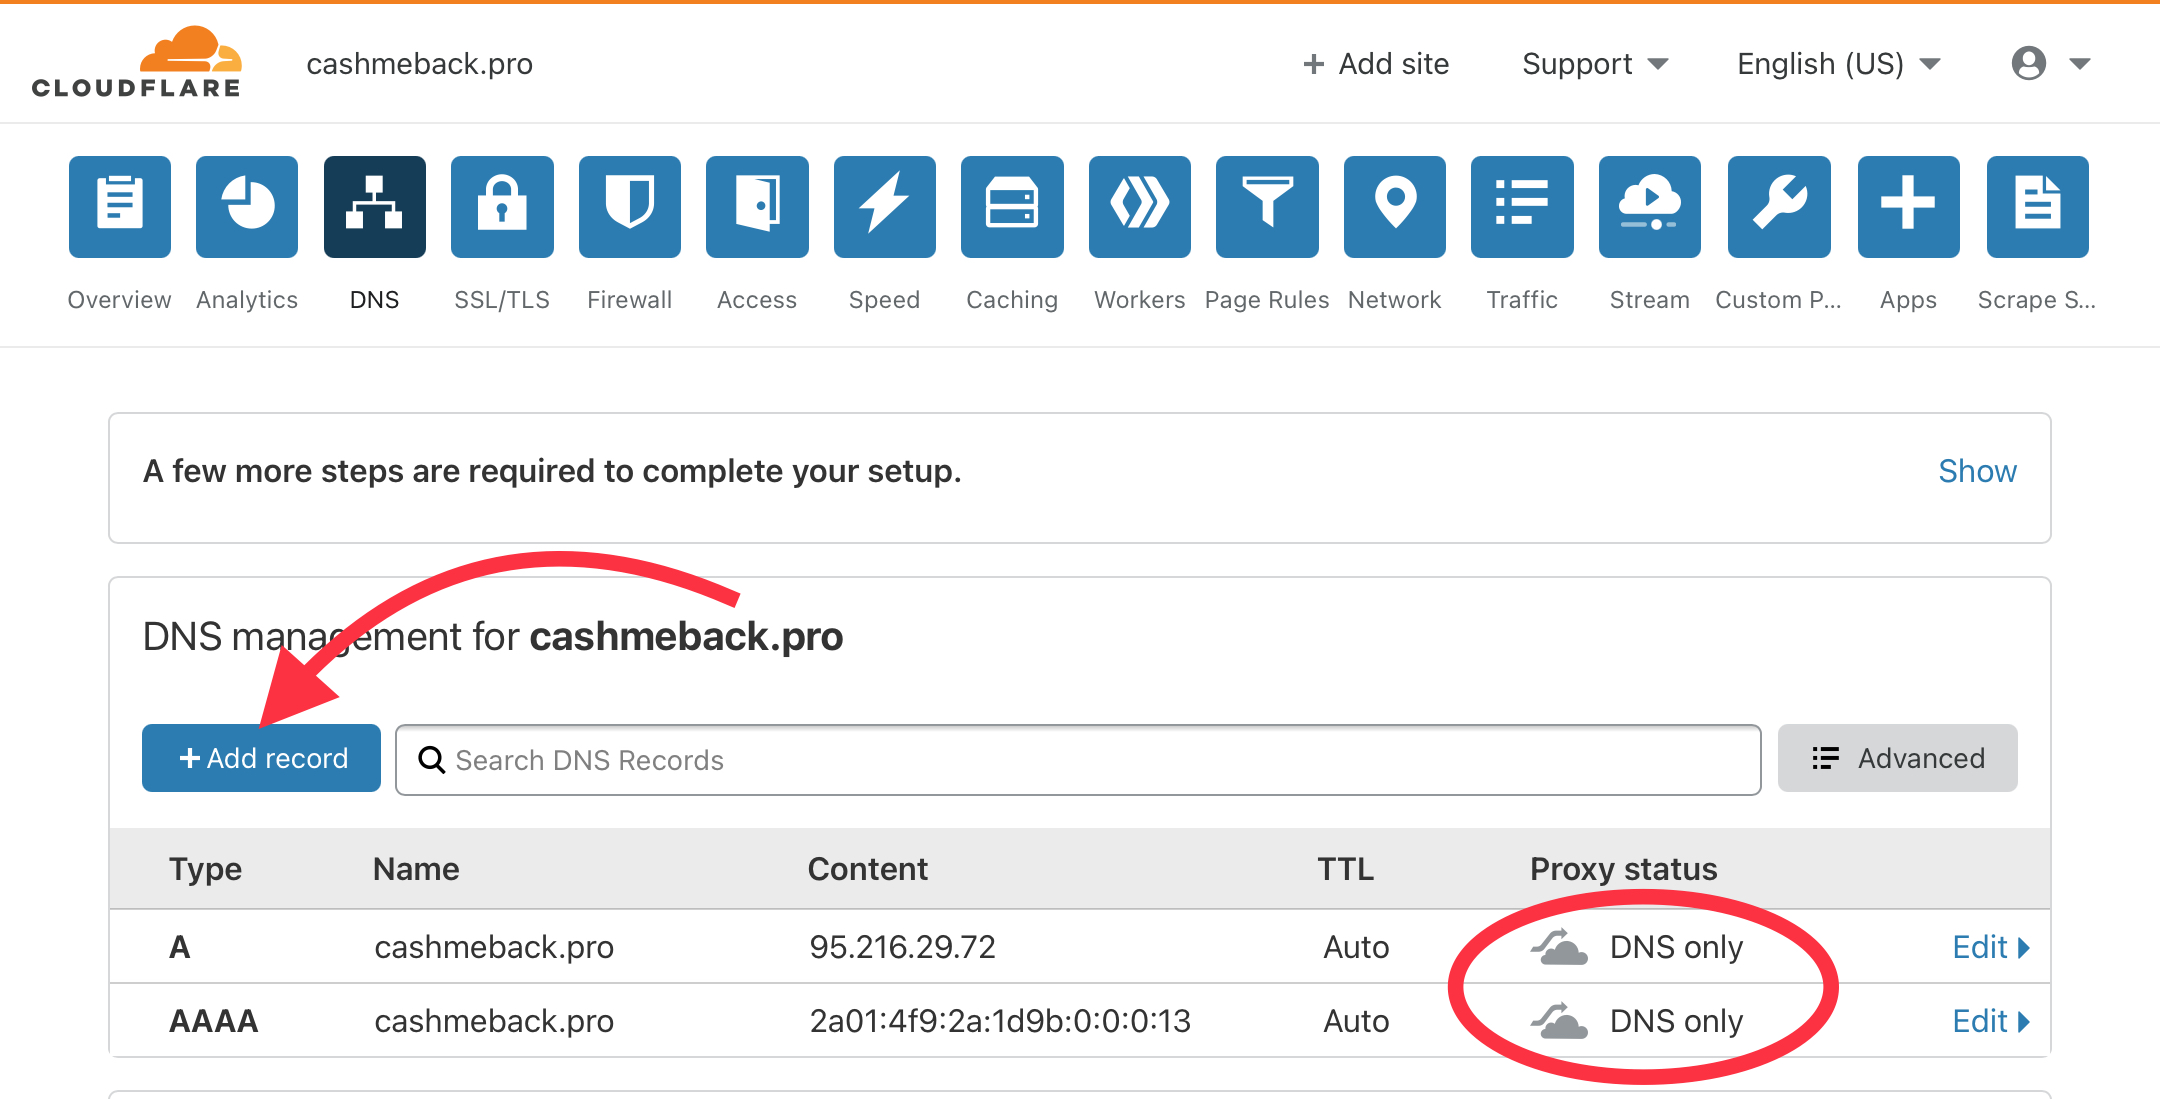
You may need to wait a couple of hours for the records to propagate and the domain to become available. Go to the “Domains – Script Parking” section and add your domain to the list. Enter just the bare domain, with no www or https in front. Once you’ve added it, hit the “Check” button.
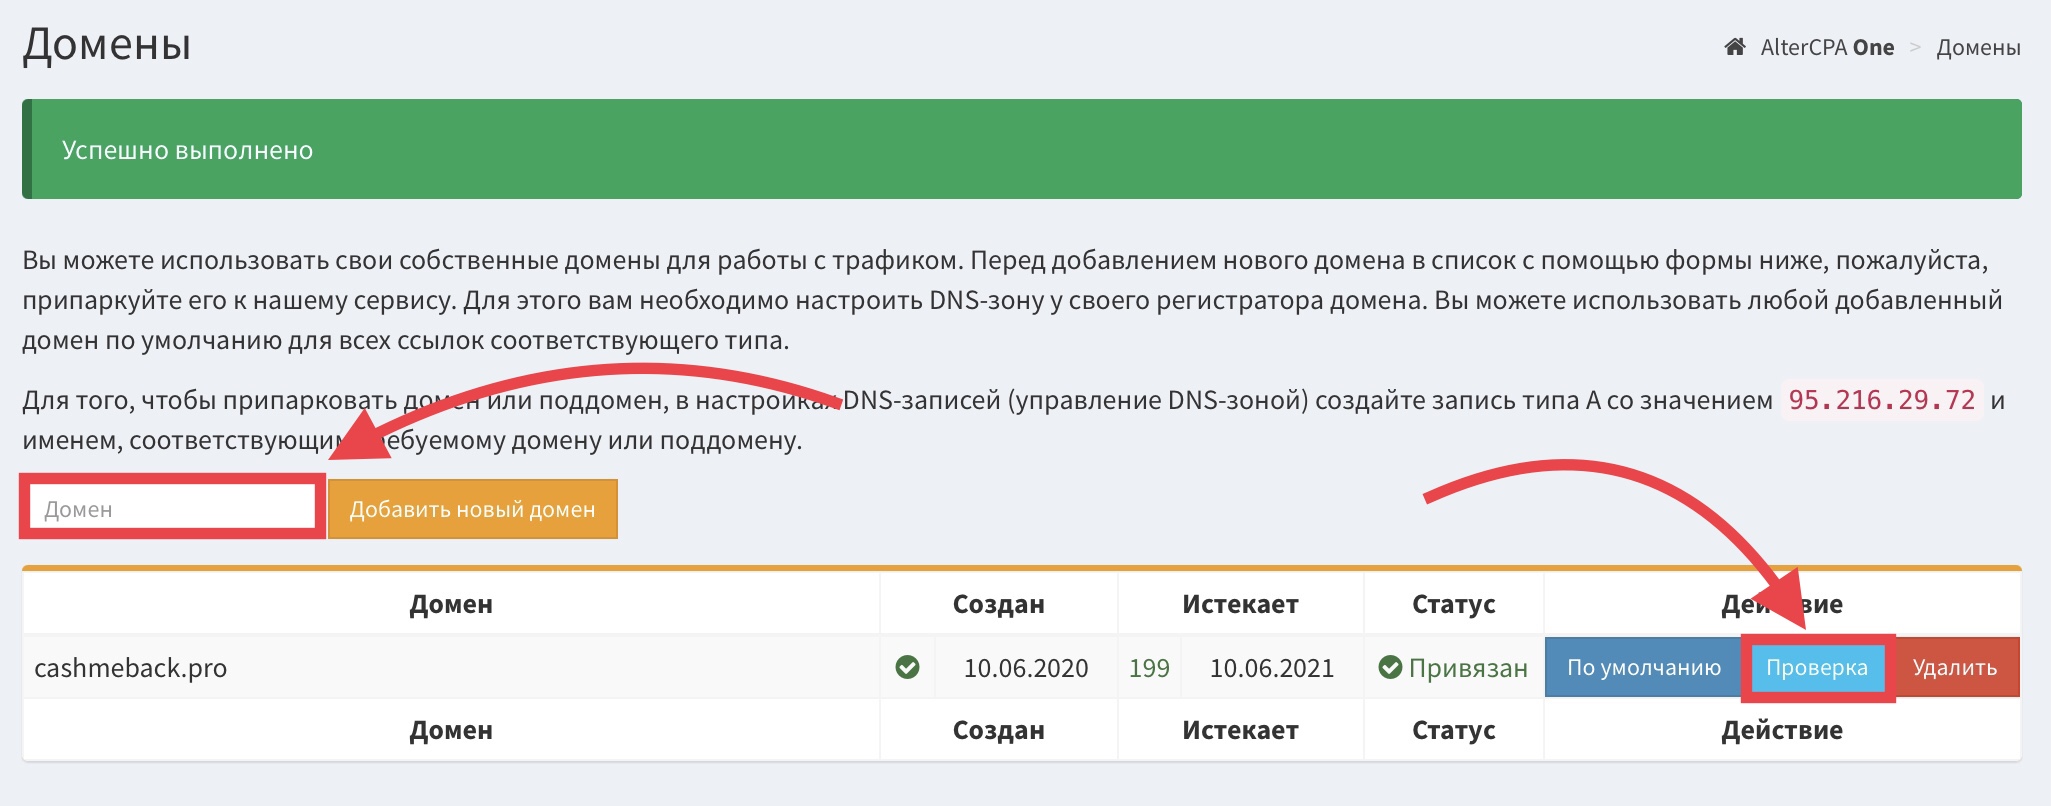
The domain should get a green “Linked” checkmark. You can re-run the check every 15 minutes – no point doing it more often, the result gets cached. An hour after getting the “Linked” checkmark, the domain will also pick up an SSL certificate. It’s worth hitting “Check” every so often so the system notices the certificate sooner. Once the domain shows both the “Linked” checkmark and the certificate lock, you’re good to go.
Besides the “Linked” checkmark, the list of parked domains also has columns for the registration and expiration dates, plus a checkmark for domain status. Don’t be surprised if that one isn’t green – that’s normal, not every domain is willing to report its status. A red cross, though, is an actual reason to worry.
Step 2. Setting Up the Site
Go to the “My Sites” section and create a new site. For the domain field, you can enter the domain we just parked, or honestly any random nonsense – we’re only using this field to visually tell the site apart in the list.
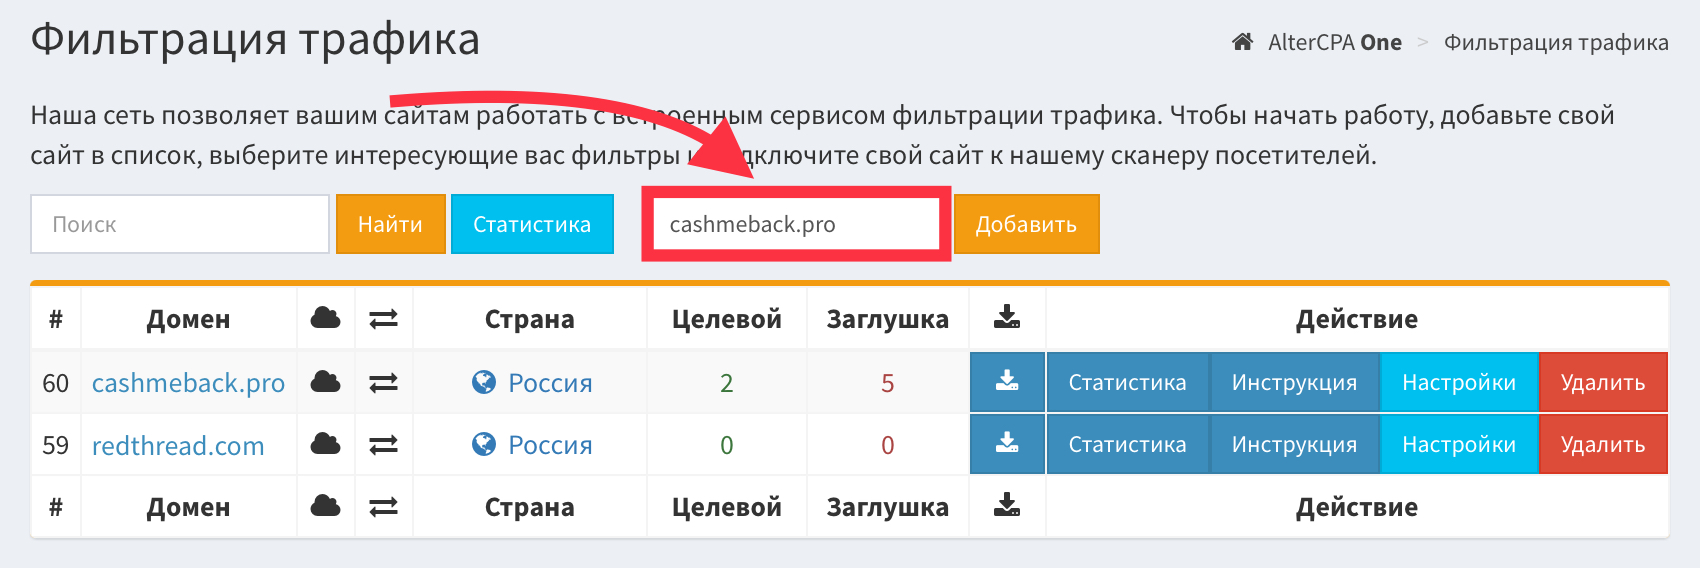
In the site’s settings, you’ll need to:
- Specify the country you’re planning to pour traffic to. It’s well worth specifying – it makes it much easier to filter out parasitic visits from cheap Dutch servers.
- Select the parked domain you added.
- Also check the “ignore domain” box.
We won’t need any of the other filtering settings.
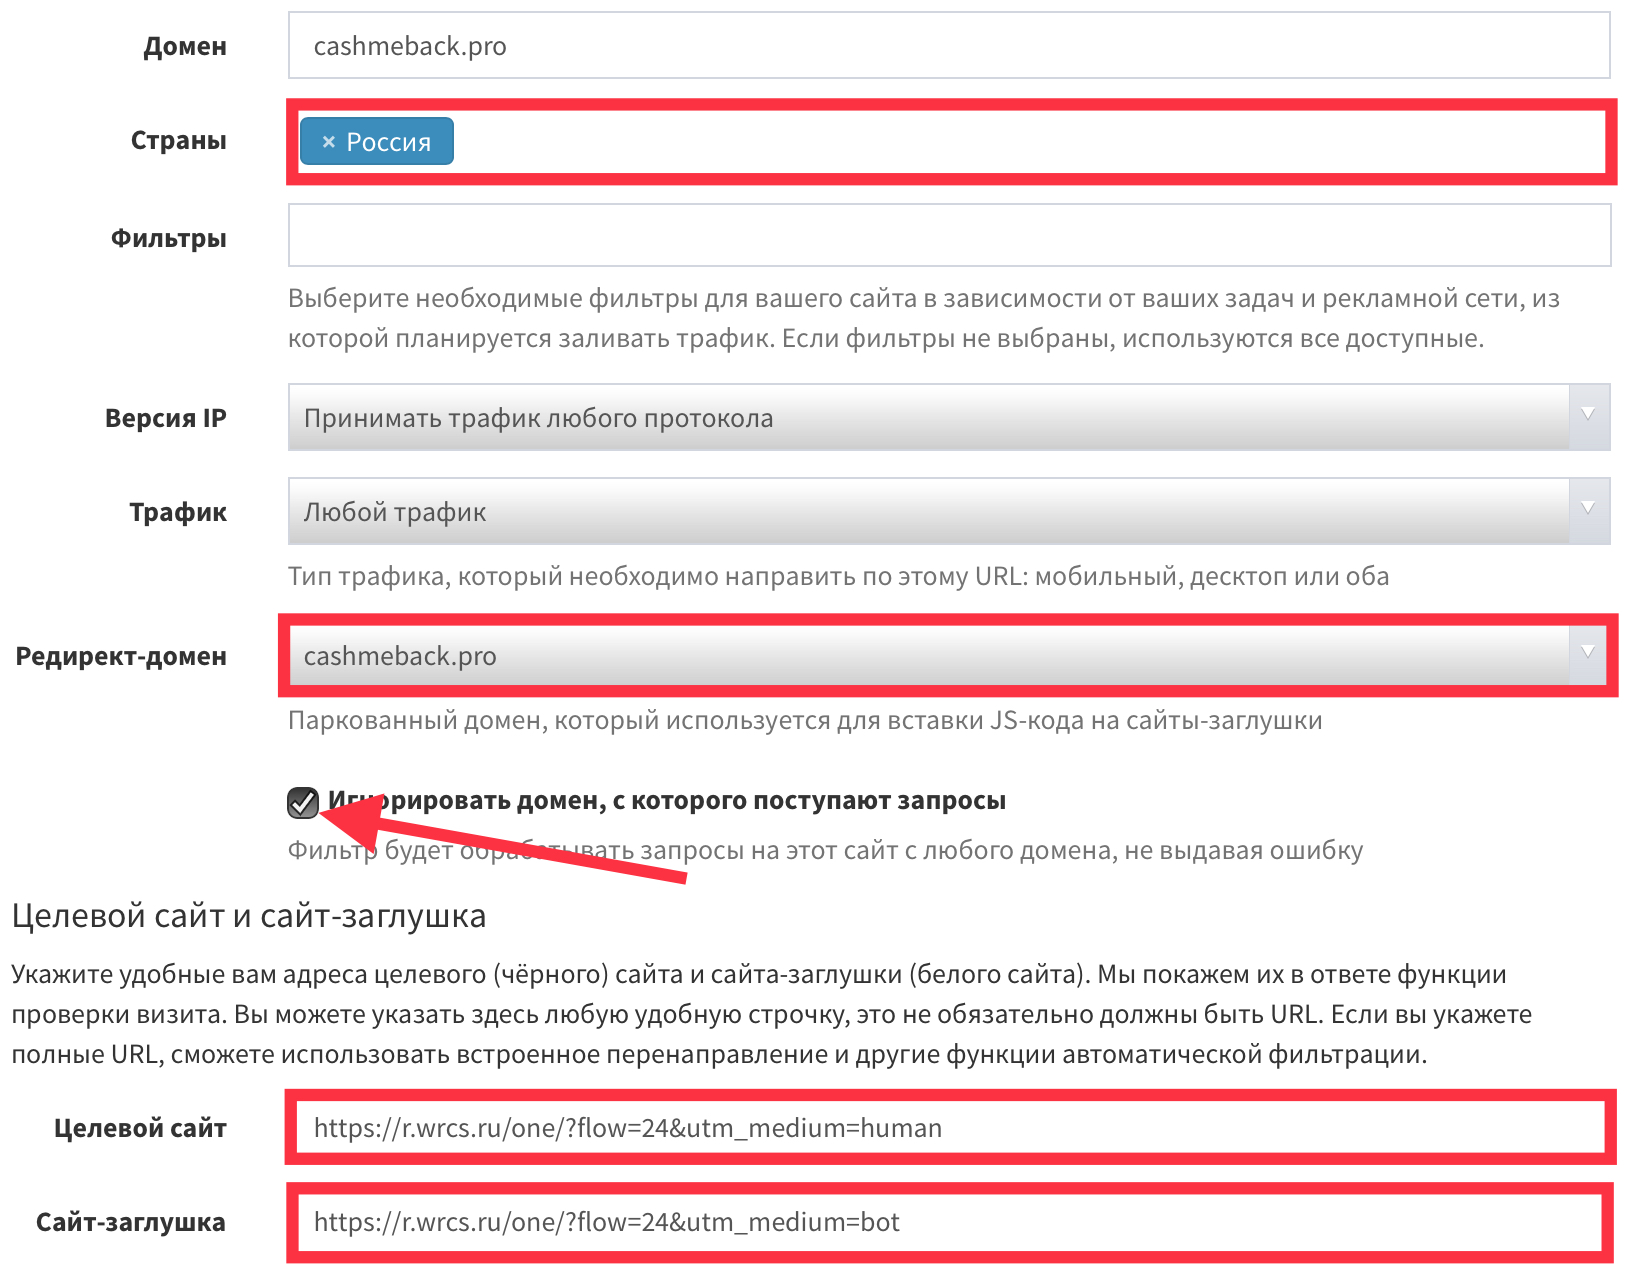
The trickiest part is setting the links for the target site and the stub site. For the target site, we enter our tracking link with the utm_medium=human parameter tacked on; for the stub site, the same tracking link but with utm_medium=bot instead.
Practice shows that some arbitrage guys are dumber than a sack of hammers – sharp thinking just isn’t their strong suit. And they’re not exactly on speaking terms with the concept of a link, either. For these thoroughly wooden souls, here’s a hint: if the link already has a question mark in it, add an ampersand (&) before your new parameter. If there’s no question mark yet, add the parameter with one instead. And if the address happens to have a hash symbol (#) in it, put all your parameters before that.
Step 3. Pouring Traffic and Getting Your Lists
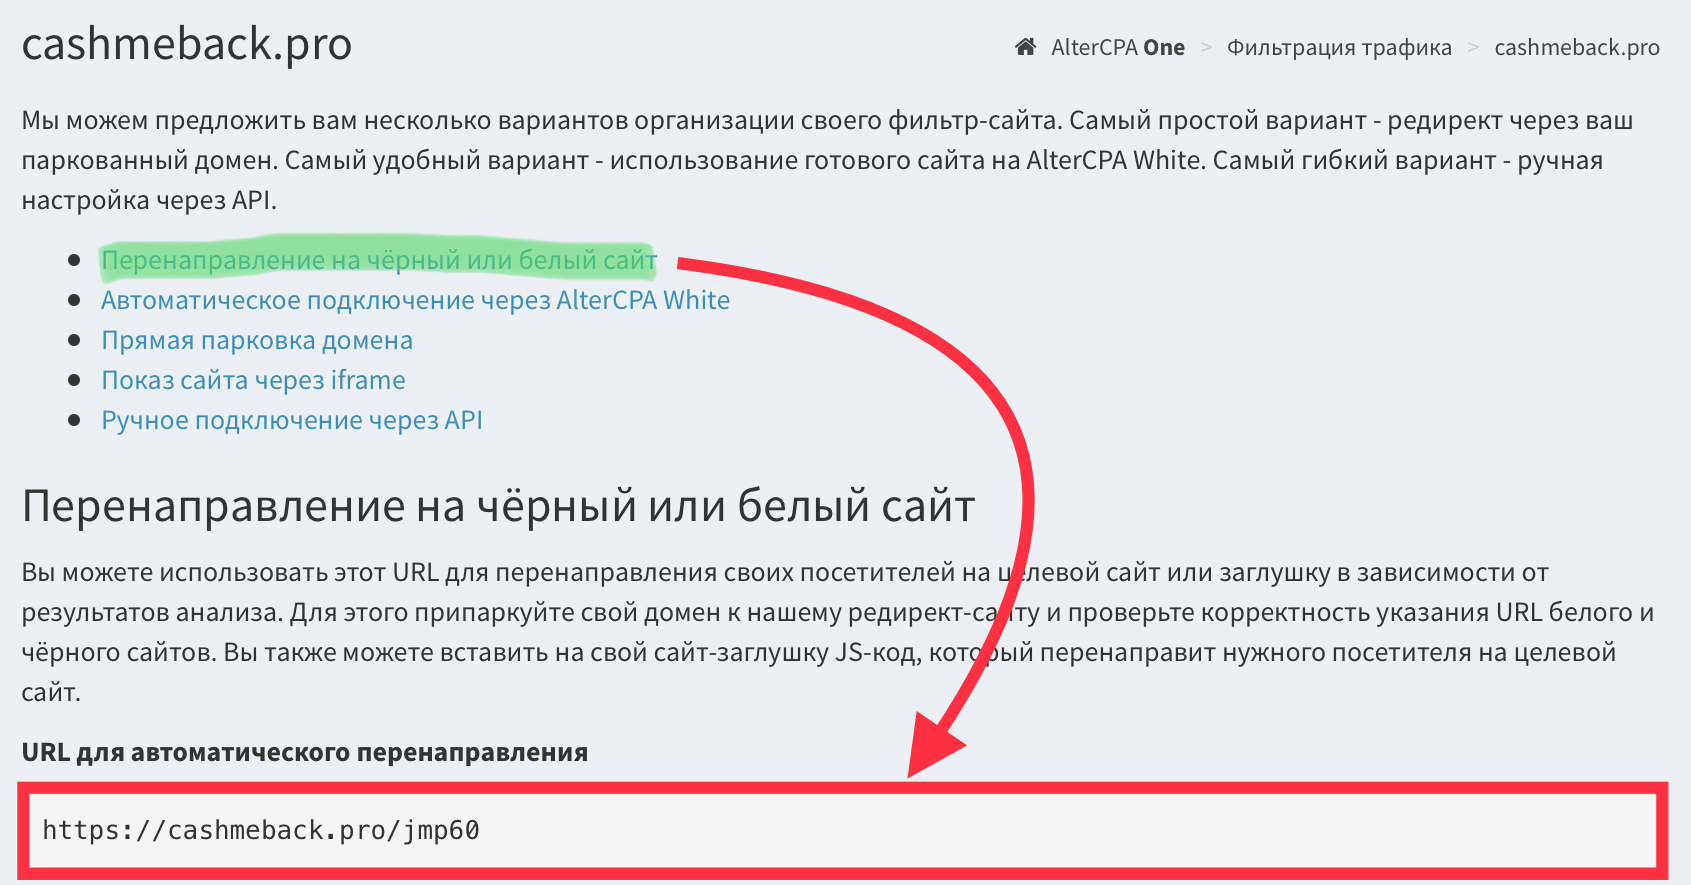
Save the site and go to the “Instructions” section. There, we need the “URL for automatic redirection” link built on our parked domain.
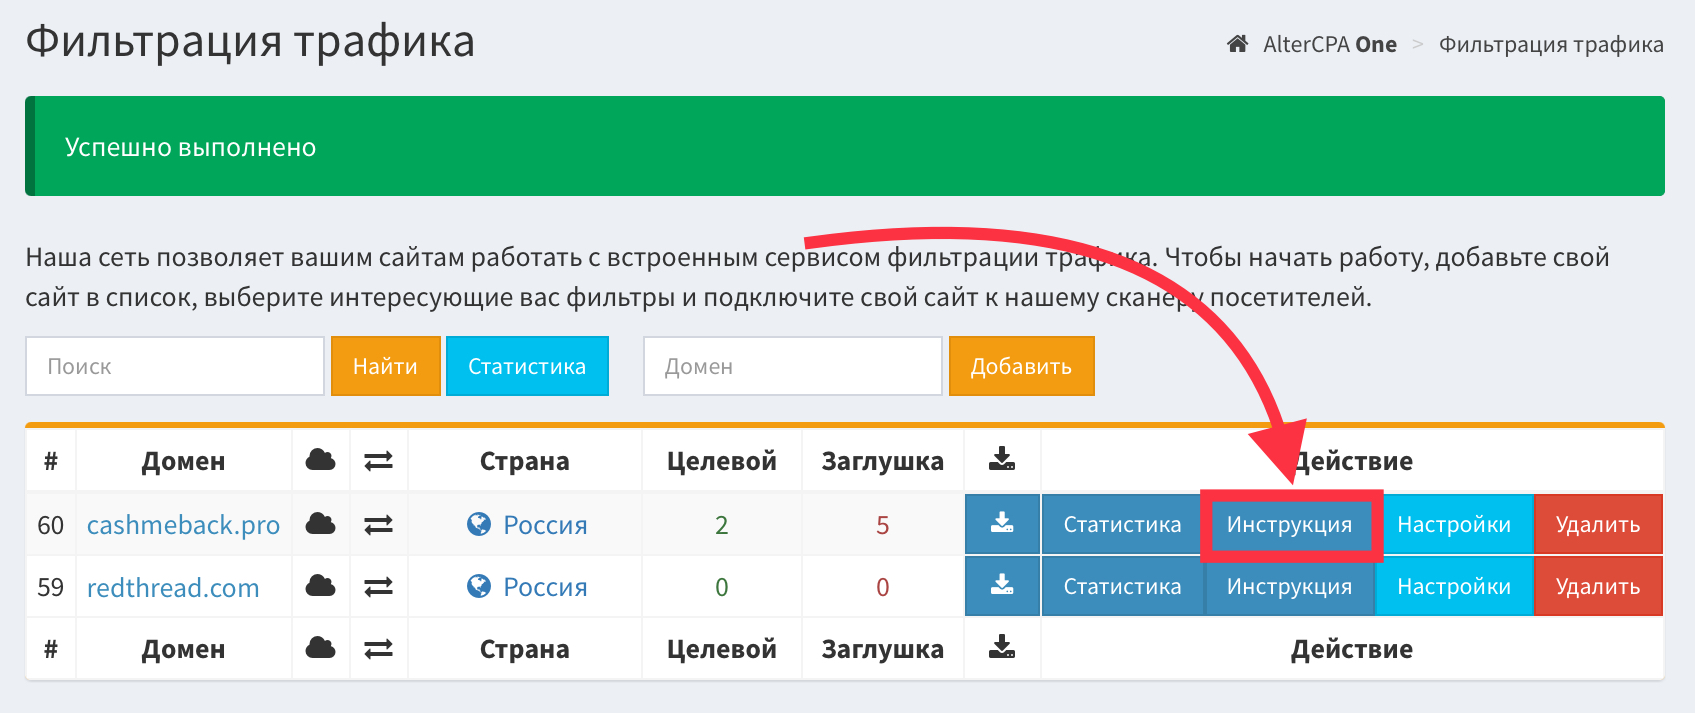
You can use this link in your teaser network. Keep in mind we’ve claimed the utm_medium parameter for ourselves, so make sure the network isn’t setting it too. Any parameters you tack onto the redirect link will get carried straight through to the target site.
Open your affiliate network’s stats and filter by the “medium” UTM tag with the value “bot” – that’s your blacklist of sources right there. Of course, how convenient it is to export and work with that blacklist depends on your affiliate network, but for the rough cases, there’s always AlterCPA Pro.
That’s it from Reznik — xoxo, everyone!