My article on how to properly kill affiliate networks with a DDoS attack will be released soon. It is better to prepare in advance and protect your network in the most non-obvious direction – to hide the real source of your postback requests.
Postback protection
- Let’s go to register at AstroProxy.com. Why AstroProxy? No, are you serious? They have a cat in a spacesuit on the main page! But seriously, you can take another service.
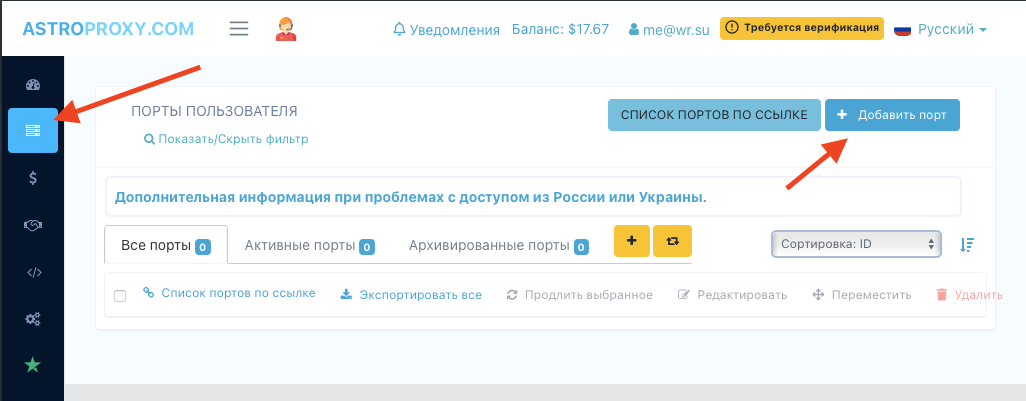
- Go to the “My proxies” section – this is the second button in the navigation bar. There we press on “Add port”.
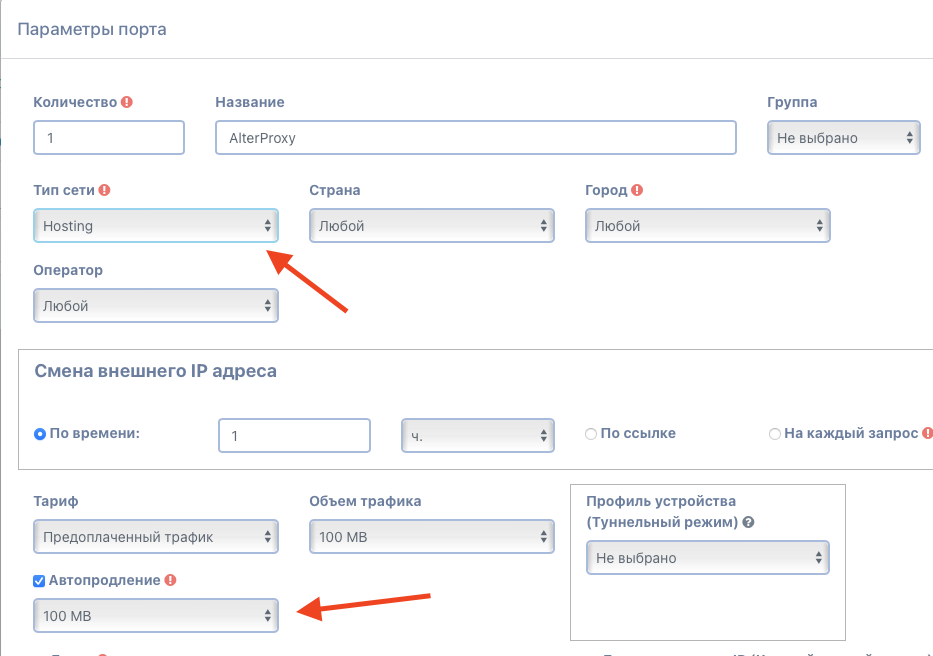
- Set the network type to “Hosting”. It is the cheapest.
- Country, city and operator – “Any”. Linking to GEO is not critical in our case.
- Enable changing the external IP address by time once an hour. It can be more often, it can be less often, once an hour is optimal. Per request – not recommended.
- We use the “Prepaid traffic” tariff with a volume of 100-500 MB and auto-renewal for the same volume.
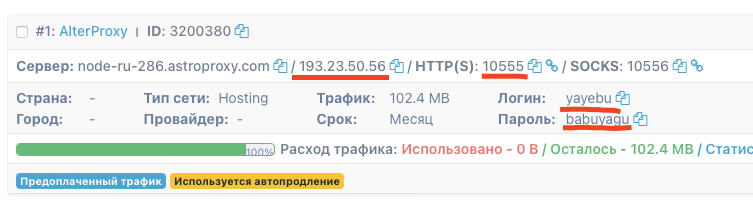
- Click “Create” and get a ready-made port for work. From it we will need an IP address, HTTP(S) port, login and password.
- Open your favorite affiliate network. Go to “Management – Settings”, there “Advanced settings” and go down to the very bottom.
- Check the “Use proxy for postbacks and ads” checkbox, specify our IP and port separated by a colon in the “Address” field (for example,
193.23.50.56:10555), and in the “Login and password” field – our login and password separated by a colon (for example,yayebu:babuyagu). - Save, relax rolls. Or do we relax? More on that in the next issue!
For those who do not understand the text, there are funny pictures:

Bonus: integration protection
There will be no funny pictures with integrations, only harsh code. You can add it to the “Request preprocessing” field in each block of suspicious integrations:
$cc['proxy'] = '193.23.50.56:10555';
$cc['pauth'] = 'yayebu:babuyagu';