
A Facebook setup isn’t rocket science, it’s six simple points: a flow for the offer, a couple of checkboxes against bots, a blank page instead of a white page, your own domain, traffic, and a server-side pixel for optimization. Below is an illustrated guide to putting all of this together in AlterCPA products: in the AlterCPA Red and AlterCPA One trackers, in your own personal tracker built on AlterCPA Lite, and in the webmaster dashboard of the AlterCPA Pro or Cloud platform.
What We’re Building and What You’ll Need
We’re building the simplest possible setup. A visitor from Facebook ads lands on your domain, the filters check whether he’s a bot and whether he’s from the right country, and then either send him to the offer or show him a blank page. And lead events fly back to Facebook straight from the server, so the ad account learns from real results.
You’ll need:
- A target offer — a link to it (in the tracker) or the offer itself in the webmaster dashboard (in the platform).
- A domain you’ll accept traffic on.
- A Facebook ad account.
For the server-side pixel at the very end you’ll also need a pixel in Events Manager and access to it, but we’ll get to that step by step.
Pick your branch. If you’re sitting in a tracker (Red, One or Lite), head to “Tracker Nuances”. If you’re a webmaster in an affiliate network running on Pro or Cloud, head to “Platform Nuances”. The pixel part is shared.
The Scheme in Six Steps
The general approach is simple and clear:
- Create a flow for the offer we need.
- Turn on traffic filtering in it: pick the target geo and activate the “Bots”, “Black lists”, “Country” and “Language” filters.
- Set a dummy trafficback and pick its working method — “Show blank page”.
- Park a domain and glue it to the flow.
- Pour traffic onto the resulting link.
- Add a CAPI pixel the proper way for optimization.
Why this way? In our experience, Facebook moderation mostly checks a page for banned words. A blank page (just like an error page) has none, which means there’s no need to mess around with a separate white page. We covered how such display methods work in more detail in the article “How Trackers Work With Traffic, or Methods of Showing Content”.
Tracker Nuances
A little bit of specifics for AlterCPA Red, AlterCPA One and your own tracker built on AlterCPA Lite. Flows, domains and tags work the same way in all of them, so one guide fits all three.
First, get the offer link from your affiliate network: the network itself gives it to you, usually through a personal manager. If you’re not sending traffic to an offer link but through your own landing page, you don’t need a link: the site goes into the site storage, more on that below, in “Useful Little Things”.
Parking the Domain
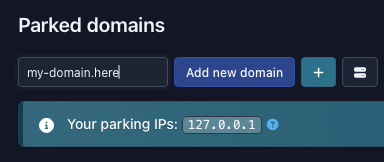
Go to the “Domains” section in the sidebar. Above the table you’ll see the line “Your parking IPs” — that’s the address you need to point your domain at.
Head to your registrar (or to the DNS panel, if the domain lives there) and create one A record with the name @ and this IP as the value. A link to the instructions sits next to the IP, and the button with the server icon will show a ready-made set of records — the “DNS entries” window. Three rules to keep in mind:
- There must be no other A, AAAA or CNAME records in the domain’s zone — delete any extras.
- A record for
wwwisn’t supported, use the main domain. - If the domain is a subdomain, it’s added as a separate domain with its own A record (the record name is the subdomain name).
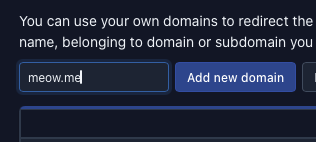
After that, just add the domain to the list with the “Add new domain” button. Then it will slowly start linking up: the tracker says it’ll all happen “within a couple of hours”, but statistically, DNS changes take anywhere from a few minutes to three days. It all depends on how fast DNS updates at your registrar. Once the status becomes “Working”, the SSL certificate follows. That usually takes about half an hour. A finished domain looks like “OK + SSL”.
Don’t press the “Check” button more often than once every 10–15 minutes: the data doesn’t update that fast. And if you added the domain before DNS started working, it may get the “Error” status: the automatic recheck doesn’t run often, so once the record is working, press “Check” yourself.
This is what adding a domain looks like in the tracker:
Creating the Flow
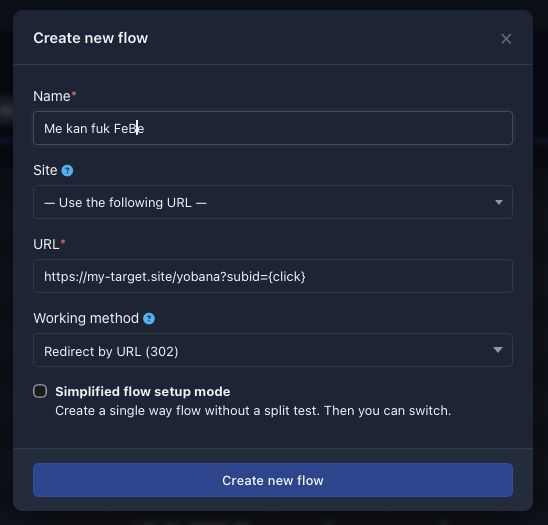
Go to the “Flows” section in the sidebar and click “Create new flow”. The name can be anything. Leave “Site” as “— Use the following URL —”, paste the offer link into the “URL” field, and leave the working method as “Redirect by URL (302)” — it’s the default.
The “Simplified flow setup mode” checkbox creates a flow with a single way and no split test (you can switch later). We don’t need a split in our setup, so decide for yourself whether you’re a smartypants ready for the serious mode, or you’re still all thumbs.
The flow creation window:
Domain, Filters and the White Page
We have a flow. Time to tick a few useful checkboxes and press a few useful buttons in it:
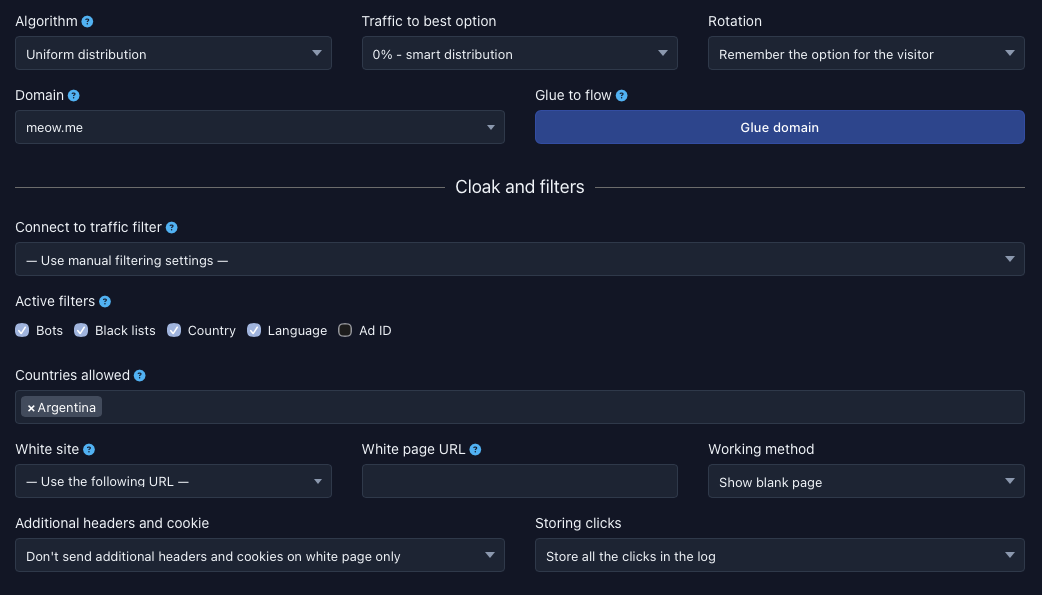
- “Domain” — pick the one you parked.
- “Glue domain” — click it. The flow is now glued to the domain’s “mug”: from now on the domain’s main page opens this flow. A domain is glued to one flow, but you can glue as many domains as you like to one flow.
- “Connect to traffic filter” — we won’t need the powerful filters, so leave “— Use manual filtering settings —” and tick the checkboxes below ourselves.
- “Active filters” — “Bots”, “Black lists”, “Country” and “Language”. “Bots” cuts off visits by headers and bot markers, “Black lists” checks the visitor’s IP, “Country” and “Language” let through only those who match by geo and by the languages of those countries. We don’t turn on the “Ad ID” check, it will cut off a ton of traffic.
- “Countries allowed” — our target. Don’t skip this field: “Country” and “Language” check the visitor against exactly this list, and with an empty list they won’t work.
- “White site” — we won’t need a serious white page either, so leave “— Use the following URL —”, and keep “White page URL” empty.
- “Working method” — “Show blank page”.
All the flow settings together:
Adding the Integration
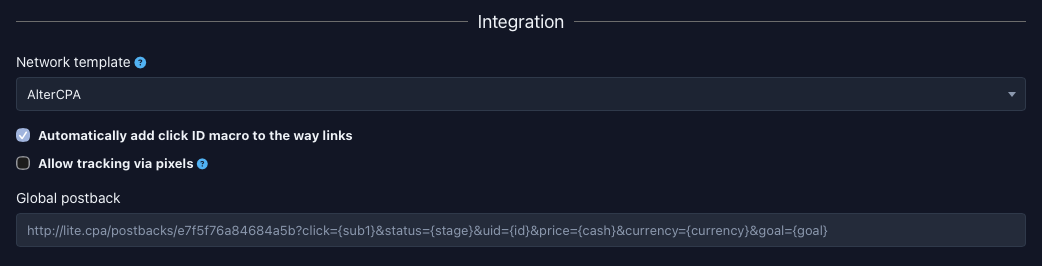
The tracker needs to know what happens to leads in the affiliate network. In the “Integration” block, pick the “Network template” for the network you need (if the network runs on our beloved AlterCPA, take the “AlterCPA” template), copy the “Global postback” and paste it into the network’s settings. Then enjoy.
The “Automatically add click ID macro to the way links” checkbox will prepare everything for you: the click ID is added to the offer link on its own (works when a template is selected). And the “Allow tracking via pixels” checkbox only comes in handy if there’s nowhere to paste the postback.
The “Integration” block:
Adding Tags
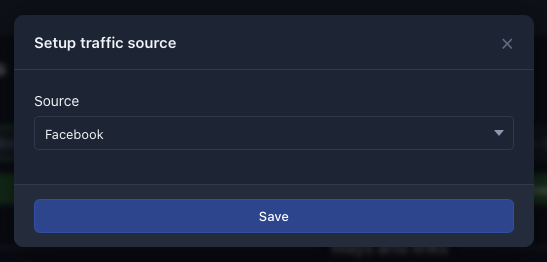
Let’s add some good stats. Scroll down to the “Tags” block, click “Setup traffic source”, pick “Facebook” and hit “Save”. The template will append tags with Facebook macros to the flow link on its own.
The source setup window:
The Link Is Ready
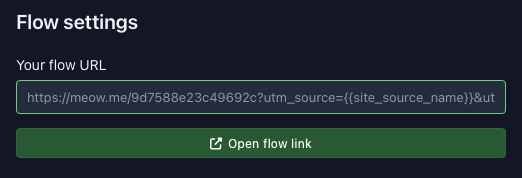
Our link is ready to go: take “Your flow URL” from the top “Flow settings” block and paste it into the ad link in the ad account. Copy it only after gluing the domain and saving the traffic source: the link changes in the process. The “Open flow link” button is there so you can check the link.
The flow link in the tracker:
Platform Nuances
This part is about the webmaster dashboard in AlterCPA Pro and Cloud. Flows here are created from an offer, and the integration with the advertiser has already been done by the network admin, so you don’t need to set it up. If you’re that very network admin yourself, you can use our tech support services — we’ll prepare offers and the advertiser integration for you.
Parking the Domain
Go to “Flows”, and there — “Parked domains”. The note above the form gives the parking IP: grab it and point our domain at it with an A record. The rules are the same as in the tracker: one A record, remove extra A, AAAA and CNAME records, don’t use www, a subdomain is added as a separate domain.
After that, add the domain with the “Add new domain” button and let it brew. According to the platform’s help, linking takes from a few minutes to three days, the SSL certificate arrives within a few hours after the “Working” status, and it’s recommended to start working with traffic once the “Status” column already says “Working”. “Check” in the domain list starts the check manually.
If the “Parked domains” item isn’t there, the network admin may have hidden it or turned off parking: ask your manager at the network about it. If he’s being a pain, find this same offer in another network through AlterCPA WatchCat. If you’re the manager yourself — don’t be a pain.
Domain parking in the webmaster dashboard:
Creating a Flow From an Offer
Go to “Offers” and find the offer we’re interested in. An offer we’re not interested in, we don’t find. In it, click “Create new flow”. If the button isn’t there, you need to request access to the offer from the network manager. If he’s being a pain, you know what to do.
The offer list:
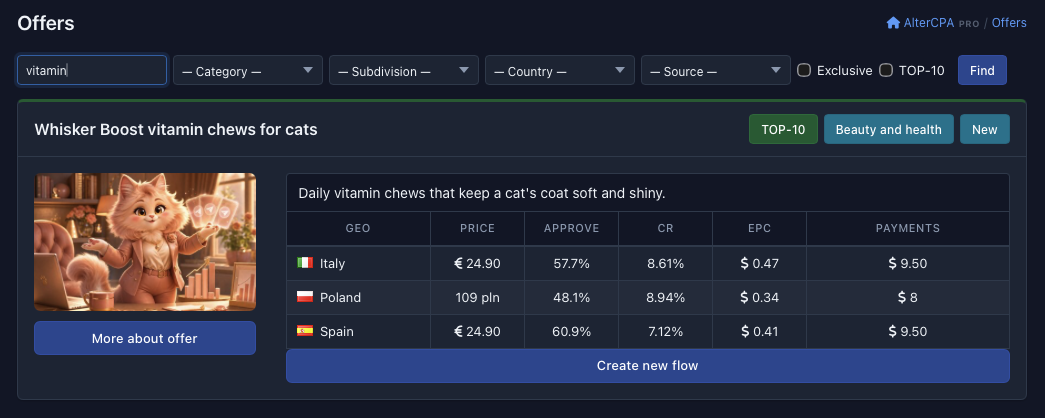
The browser will ask “Do you want to create a new flow with this offer?” — confirm, and the flow is created right away. On the “Flow settings” page, pick the prelander and lander we need and move on to the settings:
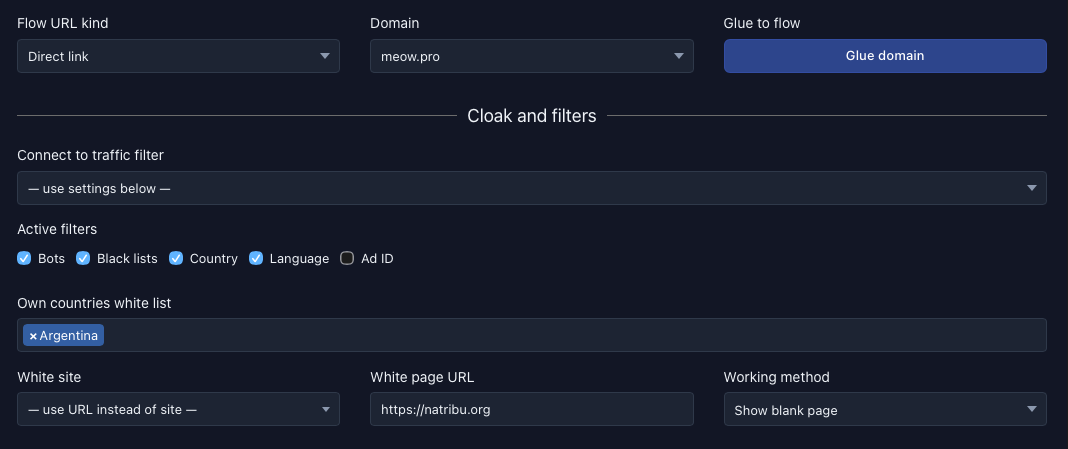
- “Flow URL kind” — “Direct link”. It opens the target site without a redirect, and with a parked and glued domain — right on your domain. The exception is external offers: there a direct link works like a regular encrypted one, meaning with a redirect.
- “Domain” — pick the one you parked.
- “Glue domain” — click it. One domain is glued to only one flow: if you glue it to another, the previous gluing is replaced (the platform will warn you). But you can glue any number of domains to one flow. The button only works with your own parked domain, and the gluing itself takes effect for a domain with the “Working” status. A glued domain picks up the settings within 10 minutes.
- “Connect to traffic filter” — we won’t need a serious traffic filter here, so leave “— use settings below —” and just tick the checkboxes.
- “Active filters” — “Bots”, “Black lists”, “Country” and “Language”. We don’t tick the fifth checkbox, “Ad ID” — we’ll explain why in “Useful Little Things”.
- “Own countries white list” — fill it in if we want to narrow the geo. If left empty, the countries of the lander or offer are used.
- “White site” — if you have such a field, leave “— use URL instead of site —”, and in “White page URL” put any link, as long as there is one: the method only works with the field filled in, and the link itself doesn’t get opened.
- “Working method” — “Show blank page”.
If there’s no “Cloak and filters” block, your network or this particular offer has banned working with trafficback: check with the manager. If … you get it.
Flow settings in the platform:
The Link and the Tail With Tags
Grab “Your flow URL”. It’s an address on your domain with the flow code in the path.
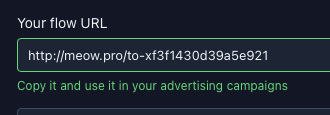
On the whole, a plain domain is enough for ads: after gluing, its main page opens the glued flow. But there are nuances:
- the domain must have the “Working” status;
- the “SubID 1..5” and “Customer” values and the click price macro (the
cpcparameter) that are fixed in the flow settings don’t get substituted on a bare domain — they’re appended only to the generated link; - for an external offer, a “direct” link is a regular redirect.
So we add the tags by hand, and before launch we make a test click and check that it showed up in the stats along with the tags.
We append a tail to the link:
?utm_source={{site_source_name}}&utm_campaign={{campaign.id}}&utm_content={{ad.id}}&utm_term={{adset.id}}&utm_medium={{placement}}&sub1={{ad.name}}&sub2={{adset.name}}
What’s what and why you need it:
utm_source={{site_source_name}}— the name of the impression source, in the stats it’s “UTM Source”.utm_campaign={{campaign.id}}— the campaign ID, “UTM Campaign”.utm_content={{ad.id}}— the ad ID, “UTM Content”.utm_term={{adset.id}}— the ad set ID, “UTM Term”.utm_medium={{placement}}— the placement, “UTM Medium”.sub1={{ad.name}}— the ad name, “SubID 1”.sub2={{adset.name}}— the ad set name, “SubID 2”.
Why do the IDs go in utm_* while the names go in sub1 and sub2? The platform saves both all the UTM tags and sub1..sub5 in every click. They show up in “Browse clicks” and “Leads and orders” as “UTM …” and “SubID 1..5”. But you can search clicks and leads by filters and group the “Clicks by UTM” report only by UTM, and by sub1..sub5 you can’t. So what you’ll count stats by (IDs) and attach the click price to, we put in UTM, and what’s just convenient to read with your eyes (names), in sub.
And our link for Facebook is ready. Paste it into the ad link.
Setting Up the CAPI Pixel
You can’t hang a pixel on a “Thank you” page here: the offer’s site isn’t yours, and an external pixel brings more problems than benefits. We use the server-side pixel, a.k.a. Conversions API: the tracker or platform sends the event to Facebook from its own server, and these events are cut by neither ad blockers nor iOS restrictions. More on this in Top 9 Features of the Ideal Tracker.
Where to Find the Section
The section is called “Facebook pixels”, it’s the fbpix hack (“Catalog of server pixels for Facebook Conversion API”). Where it is depends on your product:
- AlterCPA Red and AlterCPA One. The hack is already on: go to “Tools” and pick “Facebook pixels”. If the section isn’t there, contact your personal manager.
- AlterCPA Pro and Cloud (webmaster dashboard). The hack ships with the platform but is off by default: the network admin turns it on in “Control → Hacks and modules”. The “Tools → Facebook pixels” item shows up if the hack’s settings have the “Add the item to the Tools menu” checkbox ticked. Otherwise look for the hack in “Flows” (for webmasters) or in “Traffic” (for agencies). No section — ask the network admin to turn the hack on. He won’t be a pain.
- AlterCPA Lite. The installation is yours, so you turn the hack on yourself: “Control → Hacks and modules”. Then “Install” and “Settings”, and the “Facebook pixels” item shows up in the tracker menu.
Getting the Pixel and Token in Facebook
The form needs two values from Facebook: the pixel ID and the API token. A regular Facebook token won’t work for the Conversions API: you need a special token made specifically for it. Meta’s button names change, so if something in your interface is called slightly differently, go by the meaning.
What you’ll need beforehand: a Meta business account and admin or developer rights (without them the link for generating the token simply isn’t shown).
- Open Events Manager:
business.facebook.com/events_manager. In the left menu, pick “Data sources”. - Click your pixel. The number under its name (and also on the “Settings” tab labeled “Dataset ID”) is your pixel ID. Meta renamed “pixel” to “dataset”, but the number stayed the same. Copy it.
- If you don’t have a pixel yet, create one: click “Connect data source”, tick “Web” and click “Connect”, enter the source name, add a website link or tick “I don’t have a website”. Choose to set it up on your own and the “Meta Pixel and Conversions API” connection method, click “Next”. Then choose manual Conversions API setup and keep clicking “Continue” until you reach “Confirm setup”.
- Now the token. Open your pixel’s settings: on the “Settings” tab find the “Conversions API” section, click “Set up manually” and then “Generate access token”. In the old interface the route goes like this: under “Implement the API yourself” click the “Implementation guide” link and on the next page click “Generate access token”.
- Copy the token right away and keep it like a password: it’s a secret, don’t publish it and don’t send it in chats.
The token is tied to a specific pixel: every pixel gets its own token, and without a token the pixel doesn’t fire.
A token created through the pixel’s settings is tied to the user who created it. For a permanent setup, a system user’s token is more reliable: it belongs to the business and doesn’t break when staff change.
- Open “Business settings” → “Users” → “System users”.
- Add a system user (any name) or pick an existing one.
- Click “Add assets” → “Data sources” → “Datasets”, pick your dataset and grant “Manage” access.
- Click “Generate new token”, pick an app and set the expiration to “Never”.
- Click “Generate token” and copy it right away: Meta shows the token only once.
Filling In the Form
Click “Add” and fill in the info about our pixel:
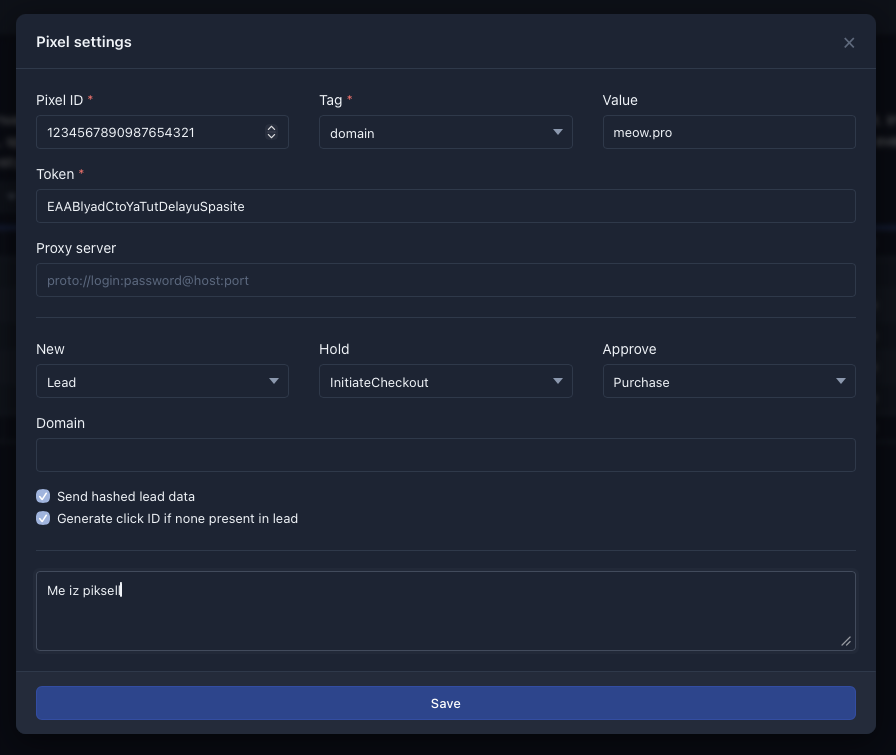
- “Pixel ID” — our weird string of digits from step 2.
- “Tag” —
domain. - “Value” — the domain we’re sending traffic to. The pixel will fire for leads whose tag matches the value. No need to duplicate the pixel ID here.
- “Token” — the token you just generated in Facebook.
- “Proxy server” — you won’t need it, leave it empty.
- Events. For the “New” lead status we set
Lead, and “Hold” and “Approve” are optional. In the screenshot, for example,InitiateCheckoutis set on “Hold” andPurchaseon “Approve”: the amount and currency go along withPurchase. If the form has the “Work only with goals selected below” field, you can use it to keep the pixel on only the goals you need, and then the ad account will learn from deposits, not registrations. - “Domain” — an optional template for the page address that goes to Facebook along with the event. In the example from the hack’s help it has the
{host}macro, but in practice you can put in whatever you see fit — it’s not for us to teach you how to work with traffic. - Checkboxes “Send hashed lead data” and “Generate click ID if none present in lead” — tick them without fail. The first sends the lead’s data in hashed form. The second insures you against losing events: without a Facebook click ID (
fbclid) the event for a lead isn’t sent, and with this checkbox the ID will be generated.
Save it and enjoy CAPI.
How to tell it’s all working: the pixel has a status in the list. “Works normally” — good. “Incorrect access token” — you pasted the wrong token, generate a new one. “Network problems” mean you should check or set up a proxy, and “Invalid parameters” — that there are problems on Facebook’s side. Every firing is visible in the postback log. You can’t specify Facebook’s test code (test_event_code) in the form, so go by the pixel’s status and the postback log. A detailed description of the fields is in the “fbpix” help.
Useful Little Things
- Don’t tick the “Ad ID” checkbox. It blocks the visit if the link has no ad network click ID:
fbclidor any other from the list (gclid,ttclidand others). Such a visitor gets the white page, and there are no exceptions by geo or device here. In our experience, with some geos and devices the click ID simply isn’t sent, and you can lose traffic. There’s a second argument too, from cloak practice: a page’s service requests (styles, AJAX) go withoutfbclid, and the Ad ID filter cuts them — in the log you can see this as “doubled” clicks marked “Ad ID”. This rule is about Facebook: for Google this checkbox, on the contrary, is needed. But you still have to grow into Google. - Better your own landing page and the site storage. Your own landing page in the tracker’s storage lives on an isolated server, not next door to “harmful neighbors”, so there are fewer reasons for a ban. Plus the visitor stays on your domain, with no redirect to someone else’s. One site can be used in several flows, the stats on it are collected separately, and the storage takes care of parking and tracking. The site is uploaded as a ZIP archive:
index.phporindex.htmlmust lie in the root, and the{click}macro has to be added to forms and links. The storage is a separate component: your own storage is installed on your clean Debian server without a control panel (the install command is in the “Sites” section), and in the tracker the “Sites” block has both the instructions and the tool for connecting hosting. What exactly is available on your plan, look in that section. More about the storage in the article on content display methods. - Send traffic to your own domain, not the system one. The system domain may end up on the ad networks’ blacklists. Moreover, it certainly got banned long ago, because some inexperienced user tried to pour some banned dick cream onto it.
- A blank page isn’t the only white page. For Facebook it’s a perfect fit, while for other sources there are other display methods. Which method to use when — in that very article. Nobody forbids making full-fledged white pages for Facebook too, but it’s pointless.
- Don’t forget the test click. Before sending traffic, follow your own link and make sure the click showed up in the stats along with the tags. If something goes wrong — in AlterCPA Red and AlterCPA One you can ask the AI assistant, in the platform — your personal manager.
What’s Next
This is the simplest Facebook setup: a flow, filters, a blank page, your own domain and a server-side pixel. If your interface looks slightly different, go by the names of the buttons and fields.
What to read next:
- The video guide “Working With FB Through AlterCPA Red and AlterCPA Lite” in our Telegram channel, all the same stuff in video format.
- “Top 9 Features of the Ideal Gambling Tracker” — why you need a server-side pixel and a built-in cloak.
- “How Trackers Work With Traffic, or Methods of Showing Content” — what to show to those the filters didn’t let through.
- “How Does Cloaking Actually Work?” — what exactly the filters check.